

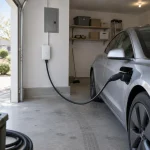
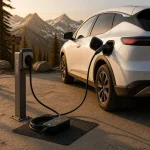
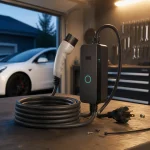
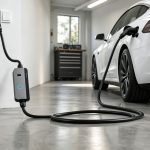
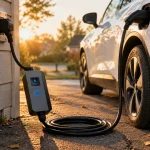

What Is a CCS Home Charger
A CCS home charger is a residential charging unit designed to work with electric vehicles equipped with a Combined Charging System inlet. The CCS standard — now the dominant charging protocol across North America, Europe, and much of Asia — builds on existing AC connector designs by adding two DC pins below the AC socket. This means a vehicle with a CCS inlet can accept both AC charging for everyday home use and DC fast charging at public stations, all through a single port.
For most homeowners, this type of charger operates as a Level 2 AC charging unit. The vehicle’s onboard charger converts the alternating current from your home’s electrical system into direct current to store in the battery. This architecture keeps the hardware simpler and more affordable than installing a full DC fast charger, which can cost tens of thousands of dollars and require significant electrical infrastructure upgrades. A well-chosen CCS home charger paired with the right AC EV Chargers setup can fully replenish your daily commute overnight — typically in six to eight hours for a standard 60 kWh battery pack.
CCS1 vs CCS2: Which Standard Applies to You
The CCS standard has two regional variants, and choosing the right one is the first step toward a compatible home installation:
- CCS1 (Combo 1): Built on the SAE J1772 (Type 1) AC connector. Standard in North America and South Korea. Supports single-phase AC charging up to 19.2 kW.
- CCS2 (Combo 2): Built on the IEC 62196 Type 2 (Mennekes) AC connector. Standard in Europe, Australia, and much of Asia. Supports both single-phase and three-phase AC charging up to 43 kW.
Before purchasing a CCS home charger, confirm which CCS variant your vehicle uses. A CCS1 vehicle cannot physically plug into a CCS2 socket without an adapter, and vice versa.
How a CCS Home Charger Relates to AC Charging
When you plug a CCS-equipped vehicle into a home AC charger, only the upper portion of the CCS connector — the AC pins — carries current. The lower DC pins remain inactive during AC charging sessions. This is why a standard Level 2 AC charger with a Type 1 or Type 2 cable is fully compatible with any CCS vehicle for home charging. The CCS inlet on your car was designed to accept exactly this type of connection.
Whether you call it an ac charger for car use, an EV AC Charger, or simply a CCS home charger, the underlying technology is the same: the unit supplies AC power, and the vehicle’s onboard converter handles the rest. Most AC EV Chargers in the 7–22 kW range deliver roughly 30–40 km of range per hour of charging — enough to fully replenish a daily commute while you sleep.
Vehicle Compatibility Checklist
Before investing in a CCS home charger, verify that your vehicle — and any future EVs you plan to own — will work with the unit you select.
CCS1 Vehicles in North America and South Korea
Most battery electric vehicles sold in North America since 2014 feature a CCS1 inlet. This includes models from BMW, Chevrolet, Ford, Hyundai, Kia, Volkswagen, Volvo, and many others. If you drive one of these vehicles, a Type 1 (J1772) AC EV Charger is your CCS-compatible charging solution at home.
CCS2 Vehicles in Europe and Asia-Pacific
In Europe, CCS2 has been the mandatory charging standard for all new EVs since 2021 under the EU Alternative Fuels Infrastructure Directive. Nearly every EV sold in Europe — including Tesla Model 3 and Model Y — uses a CCS2 inlet. A Type 2 EV AC Charger is the correct home charging choice for these vehicles.
Tesla, PHEVs, and Adapter Considerations
Tesla vehicles sold in North America before 2025 use the proprietary NACS connector, but newer models and adapter kits now support CCS1. Plug-in hybrid electric vehicles (PHEVs) from most major brands also carry CCS inlets, though their smaller batteries mean they charge faster on a basic ac charger for car application. If you own an imported vehicle or travel between regions with different standards, adapters are available to bridge CCS1 and CCS2 connectors. However, adapters may limit charging speed and are not always certified for safety in every jurisdiction. For a permanent home installation, match the charger connector to your local vehicle fleet standard rather than relying on an adapter.
CCS Home Charger vs. a Standard AC EV Charger
Buyers often wonder whether a CCS home charger differs from a regular AC EV Charger. The short answer: for home use, they are functionally the same device. The distinction lies in the connector and the charging modes supported.
A standard AC EV Charger — sometimes called an ac charger for car applications — delivers alternating current through a Type 1 or Type 2 cable. The vehicle’s onboard charger handles the AC-to-DC conversion. An EV AC Charger rated at 7–22 kW can fully recharge most EV batteries overnight, making it the practical choice for residential installations. A CCS home charger is simply an AC EV Charger that uses a connector compatible with the CCS inlet on your vehicle.
The CCS label becomes relevant when you also want access to public DC fast charging networks. Your vehicle’s CCS inlet supports both modes, but the home unit itself only uses the AC portion. The table below summarizes the key differences:
| Feature | Home AC Charger (CCS-Compatible) | Public DC Fast Charger (CCS) |
|---|---|---|
| Typical Power | 7–22 kW | 50–350 kW |
| Charging Time (60 kWh Battery, to 80%) | 6–8 hours | 20–40 minutes |
| Installation Cost | $500–$2,500 | $10,000–$50,000+ |
| Electrical Requirement | 240V, 40–60A circuit | 480V three-phase, high amperage |
| Best Use Case | Overnight home charging | Highway stops, fleet depots |
For residential use, a CCS home charger operating in AC mode is the right tool. DC fast chargers require utility-grade power connections, specialized permits, and equipment that far exceeds what a home electrical panel can supply. If you are evaluating AC EV Chargers for a home project, focus on units in the 7–11.5 kW range — they offer the best balance of speed, cost, and electrical compatibility for most residential installations.
Electrical Requirements Before Installation
Proper preparation prevents costly mistakes. Before scheduling your installation, assess the following electrical factors.
Panel Capacity and Amperage
Most modern homes have a 200-amp electrical service panel, which is typically sufficient for a Level 2 charger. Older homes with 100-amp panels may need an upgrade. According to the U.S. EPA’s guide to home EV charging, if your home has at least 200 amps and two open slots for a double-pole breaker, you likely have the capacity for a Level 2 installation without a panel upgrade.
A typical 40-amp Level 2 unit requires a dedicated 50-amp, 240-volt circuit. A 48-amp model — the maximum most residential panels support on a single circuit — requires a 60-amp breaker. Your electrician will perform a load calculation to confirm your panel can handle the additional demand alongside your existing appliances.
Wiring Gauge and Circuit Breaker Sizing
Wire gauge must match the circuit amperage to ensure safe, efficient operation:
- 40-amp circuit: 8 AWG copper wire for runs up to 100 feet
- 50-amp circuit: 8 AWG copper wire for standard residential distances
- 60-amp circuit: 6 AWG copper wire
Longer wire runs may require thicker gauge to prevent voltage drop. Always follow the ac charger for car manufacturer’s specifications and local electrical code when sizing wire for your CCS home charger.
Permits and Code Compliance
In most jurisdictions, installing a Level 2 charger requires an electrical permit and a post-installation inspection. The inspector verifies breaker sizing, wire gauge, conduit installation, and proper grounding. Skipping the permit process can void your home insurance and create problems when you sell the property. Check with your local building department for specific requirements in your area.
Installation Tips for a Smooth Setup
Choose the Right Location
Install the charger as close to your electrical panel as possible to minimize wiring costs. The unit should be within reach of your vehicle’s charging port — most EVs have the inlet on the front left or right side. For outdoor installations, choose an EV AC Charger rated for weather resistance (look for NEMA 4 or IP65 ratings).
Hardwired vs. Plug-In Configuration
You have two installation options for your CCS home charger:
- Hardwired: The charger connects directly to the circuit with no outlet. This eliminates a potential failure point and is required for units rated at 48 amps or higher. It provides a cleaner, more permanent installation.
- Plug-in (NEMA 14-50 outlet): The charger plugs into a dedicated 240V outlet. This allows you to relocate or replace the unit without an electrician, but the outlet adds a potential point of failure.
For most homeowners, hardwired installation is the recommended approach — it is safer, more reliable, and often required by local code for higher-amperage units.
Weatherproofing for Outdoor Installations
If your charger will be mounted outdoors, ensure it carries an appropriate weatherproof rating. Use UV-resistant cables, weatherproof conduit, and a charger enclosure rated for rain and temperature extremes. Many quality AC EV Chargers are designed for both indoor and outdoor use, but verify the IP rating before purchase.
Smart Charger Features to Consider
Modern EV AC Charger units often include smart features that improve convenience and energy management. WiFi connectivity allows you to monitor charging sessions, schedule off-peak charging to take advantage of lower electricity rates, and receive maintenance alerts through a mobile app. Some chargers support the OCPP (Open Charge Point Protocol) standard, enabling integration with home energy management systems and solar panel setups. Load management capabilities let you share a single circuit between the charger and other household appliances, automatically reducing charging current when demand peaks elsewhere in the home.
Estimated Costs and How to Save
A typical Level 2 installation involves several cost components. While exact figures vary by region and site conditions, here is a general breakdown:
| Cost Factor | Typical Range |
|---|---|
| Charger hardware (7–11.5 kW) | $400–$700 |
| Electrical labor and materials | $300–$800 |
| Electrical panel upgrade (if needed) | $1,500–$4,500 |
| Permit and inspection fees | $50–$300 |
To reduce costs on your CCS home charger project, consider these strategies:
- Install near the panel: Shorter wire runs mean lower labor and material costs.
- Check for incentives: Many regions offer tax credits, rebates, or utility discounts for home EV charger installations. In the U.S., the federal 30C tax credit can cover a portion of the installation cost.
- Choose the right amperage: A 40-amp ac charger for car setup on a 50-amp circuit is sufficient for most drivers and avoids the need for a 60-amp circuit upgrade.
Conclusion
A CCS home charger is a practical, cost-effective way to keep your electric vehicle ready every morning. By understanding the CCS1 and CCS2 connector standards, confirming your vehicle’s compatibility, and preparing your home’s electrical system before installation, you can avoid common pitfalls and ensure a safe, reliable charging setup.
Whether you are charging a single vehicle overnight or planning a multi-car household, a properly specified CCS home charger paired with the right AC EV Chargers delivers the convenience and efficiency that makes EV ownership seamless. For teams evaluating charging hardware for residential or commercial projects, EV Taurus Power offers AC and DC charging solutions with OCPP-enabled management and multiple connector options to match your local CCS standard.